We want to help you become an expert at using Helper Helper, so we’ve put together a handy guide to help you on your way. If you prefer, you can catch this easy to follow along video tutorial here: https://vimeo.com/283126313.
We’ll start by giving you a general overview of the app and the portal by describing the demo and tutorial accounts.
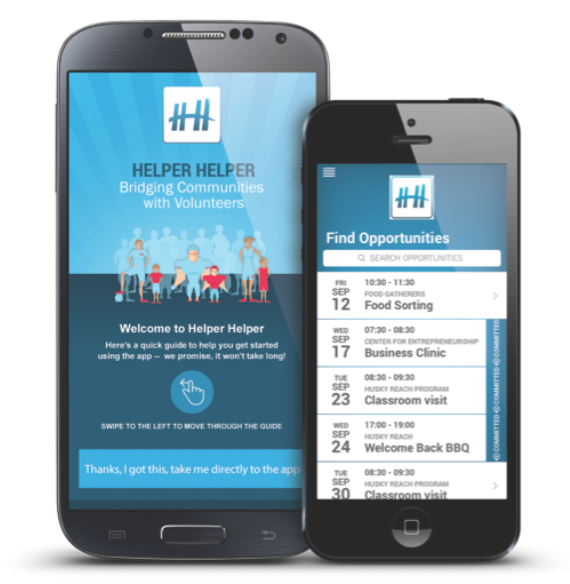 App
App
The menu in the app contains several selections that will enhance your Helper Helper experience. By choosing Find Opportunities, you will have access to all available community engagement opportunities. Stats and Goals are also located next and here you will find you are easily able to retrieve your participation records when necessary.
Moving down the menu selection, Team Impacts allows you to assess participation and stats across different groups and can allow for organizational competitions. Next, we have Add Past Commitment, which allows users to add a past event and hours that did not involve and administrator. The menu also offers tutorial screens so that your volunteers can easily become familiar with using the app effectively.
Web Portal
The web portal contains more in depth information and uses a format that includes tabs across the top of the web page in order to access relevant data. The Home Screen provides a general overview of your commitments, volunteers, validated hours and your dashboard. The remaining tabs provide detailed information for Volunteers, Teams, Organizations, Opportunities, and Reports.
Once you have logged into your account, it is easy to add a community engagement partner. Using the Organization tab:
- Select Add Organization.
- In the pop-up box, add all relevant information.
 Once you have created an organization, you can create opportunities for your volunteers. Using the Opportunities tab:
- Select an organization from the dropdown menu.
- Complete text boxes with relevant information. As you enter this information, you will be able to simultaneously view how the content will appear in the mobile app.
- From this screen, you will be able to create multiple time slots and designate a maximum number of participants for each slot.
- For added convenience, you will be able to replicate a singular event by adding additional dates, making it a repeating event, without needing to re-enter all of the information.
- You will enter a coordinator email so that your event supervisor will receive event reminders, volunteer information, and a validation code, which will be used verify participation hours.
- Save the opportunity.
Eventually, you’ll want to upload your participant rosters so that volunteers have access to Helper Helper features.
- Click on the volunteers tab and select upload roster.
- Choose an organization/institution from the drop down menu.
- Click choose file to upload an Excel spreadsheet containing your participant information.
- Review information and click next. This will allow you to upload thousands of participants at once.
- Review information again before saving.
- Click on institutional settings in the Helper Helper app section. You will be able to personalize all of the communication to your teams found in the this section.
In this next step, we will go over logging in and validating participant hours from the web app. Here, you have the ability to view opportunities as your participants do.
- Select the opportunity and click the box to sign up for the event. You will be able to add events to your calendar so that you will receive event reminders leading up to the event.
- Administrators will have the ability to view all relevant event information, including who had signed up and who the coordinator is. Administrators will be able to add participants and check participants into the event.
- Participants will enter a validation code that into the check-in screen that will be provided by the coordinator.
There may be times when you will need to add a past commitment that your participants have already completed. Using the web app, click past commitment.
- Enter the date of the event and the name of the organization from the drop down menus. Add coordinator information as well as your responsibilities and tasks.
- The administrator will have the opportunity to validate past commitments from the opportunities page in the portal.
Now, we will review reports. This is important so that your organization will have data readily available to provide to participants or other entities. From the portal, click the reports tab.
- You will see specific information provided in each of the following tabs: overview, teams, volunteers, opportunities, and organizations.
- If desired, you can use the filter to extract only the details you are wanting to collect. You will be able to download all of the reports.
The final step of the video tutorial demonstrates how to invite participants to view opportunities on Helper Helper. From the portal, go to the home menu.
- Click invite volunteers.
- Complete e-mail template. Be careful not to modify your username or password before sending.
- Your participants will be able to view the opportunities you have posted and record the relevant information.